


The HDX Sprayer Parts Manual provides essential guidance for understanding, assembling, and maintaining your sprayer. It covers key components, troubleshooting, and safety tips to ensure optimal performance and longevity.
1.1 Overview of the HDX Sprayer
The HDX Sprayer is a versatile and durable tool designed for efficient liquid application. Featuring a translucent polyethylene tank, it allows easy monitoring of liquid levels and prevents spills. The automatic pressure system ensures consistent spray performance, while the adjustable wand and nozzle provide precise control. Built with high-quality materials, the HDX Sprayer is ideal for gardening, pest control, and other outdoor tasks. Its compact design and user-friendly interface make it a practical choice for both professionals and homeowners. Safety features, such as a secure locking mechanism, enhance its reliability and ease of use.
1;2 Importance of the Parts Manual
The HDX Sprayer Parts Manual is crucial for proper assembly, maintenance, and troubleshooting. It provides detailed diagrams and instructions, ensuring users can identify and replace parts efficiently. Regular maintenance, as outlined, extends the sprayer’s lifespan and prevents common issues like clogged nozzles or pressure loss. By following the manual, users can address problems promptly, saving time and money. It also serves as a reference for safety guidelines, ensuring safe operation and longevity of the sprayer. This manual is essential for maximizing the performance and durability of the HDX Sprayer.

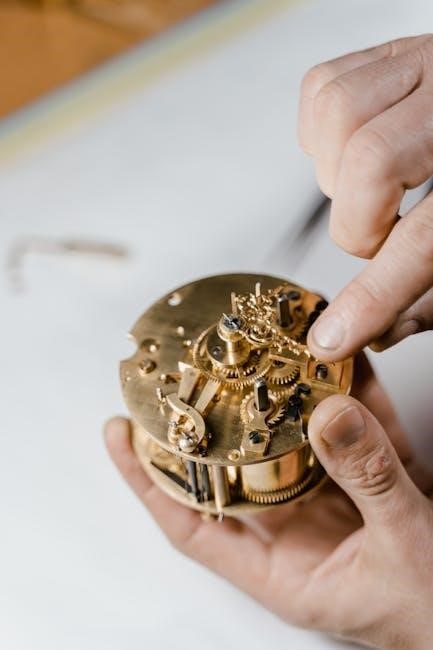
Key Components of the HDX Sprayer
The HDX Sprayer features a durable tank, efficient pump, adjustable wand, precision nozzle, flexible hose, and essential safety mechanisms, ensuring reliable performance for various spraying tasks.
2.1 Tank and Funnel Top Design
The HDX Sprayer features a durable, high-density polyethylene tank with a translucent, semi-translucent funnel top design. This allows for easy monitoring of liquid levels, preventing overfilling and spills. The tank is designed for durability and resistance to chemicals, ensuring long-lasting performance. Its no-spill fill design makes refilling convenient and mess-free. The funnel top also aids in pouring liquids accurately, reducing waste. This design enhances user convenience while maintaining the sprayer’s efficiency and reliability for various applications, from gardening to pest control.
2.2 Pump and Pressure System
The HDX Sprayer’s pump and pressure system are designed for efficient and consistent performance. The pump is constructed from durable materials to withstand regular use and chemical exposure. It features an automatic pressure mechanism, ensuring a steady flow of liquid during operation. Regular maintenance, such as inspecting and cleaning the pump, is crucial to prevent issues like pressure loss. Replacing worn-out seals or O-rings can restore functionality if the pump fails to build pressure. Proper care ensures the system remains reliable for spraying tasks, from gardening to pest control.
2.3 Wand and Nozzle Assembly
The wand and nozzle assembly is a critical part of the HDX Sprayer, designed for precise control and efficient spraying. The wand is constructed from durable materials, ensuring longevity and resistance to chemical exposure. The nozzle is interchangeable, offering options for different spray patterns. Regular cleaning of the nozzle is essential to prevent clogging, which can be resolved by soaking it in warm water or replacing it if damaged. Proper maintenance of this assembly ensures consistent performance and accuracy when spraying liquids for gardening, pest control, or other applications.
2.4 Hose and Fittings
The HDX Sprayer’s hose and fittings are designed for durability and flexibility, ensuring reliable performance. The hose is constructed from high-quality, chemical-resistant materials, while the fittings provide a secure connection. Regular inspection of the hose for cracks or damage is crucial, and replacing worn-out fittings can prevent leaks. Properly tightening all connections ensures a leak-free operation. Maintaining the hose and fittings is essential for optimal sprayer functionality and longevity, ensuring consistent pressure and flow during use.
2.5 Safety Features
The HDX Sprayer is equipped with multiple safety features to ensure safe and efficient operation. The translucent tank allows easy monitoring of liquid levels, preventing overfilling. The automatic pressure system is designed to maintain consistent output, reducing the risk of accidental sprays. Durable, chemical-resistant materials ensure longevity and prevent corrosion. Additionally, the no-spill fill design minimizes exposure to potentially hazardous substances. Always follow the manual’s guidelines for handling and assembling the sprayer to maintain safety standards and prevent accidents during use.
Assembly and Disassembly Guide
This guide provides step-by-step instructions for assembling and disassembling the HDX Sprayer, ensuring proper installation of components like the tank, pump, wand, and nozzle for optimal performance.
3.1 Step-by-Step Assembly Instructions
Begin by attaching the wand to the tank using the provided fittings. Next, connect the hose to both the wand and the pump. Ensure all connections are secure. Attach the nozzle to the wand, making sure it is tightly fitted. Finally, place the funnel top on the tank and verify that all components are properly aligned. Tighten any loose connections to prevent leaks. Follow these steps carefully to ensure your HDX Sprayer is assembled correctly and functions optimally for your spraying needs.
3.2 Disassembly for Maintenance
To disassemble the HDX Sprayer for maintenance, start by detaching the wand from the tank. Next, remove the hose from the pump and tank connections. Take off the nozzle and any additional attachments. Gently pull the funnel top away from the tank. Inspect each component for blockages or wear. Clean or replace parts as needed, paying special attention to O-rings and gaskets. Reassemble in the reverse order, ensuring all connections are secure to maintain proper function and prevent leaks during future use.
Maintenance and Care Tips
Regularly clean the tank and nozzle to prevent clogs. Store the sprayer in a dry place, empty of liquids. Inspect hoses and O-rings for wear and replace as needed.
4.1 Cleaning the Sprayer
Regular cleaning is crucial for maintaining the HDX sprayer’s performance. Rinse the tank with warm water and mild detergent after each use. Dry thoroughly to prevent mold. Soak the wand and nozzle in warm water to remove debris. Use a soft brush to clean small openings. Avoid harsh chemicals that may damage components. Always dry the sprayer after cleaning to prevent rust or mildew. Check for worn-out parts like O-rings and gaskets, and replace them if necessary. Proper cleaning ensures optimal functionality and extends the sprayer’s lifespan.
4.2 Storing the Sprayer
Proper storage is essential to maintain the HDX sprayer’s condition. Drain the tank completely and rinse with clean water. Allow all parts to dry thoroughly to prevent mold or mildew. Store the sprayer in a cool, dry place away from direct sunlight. Detach the wand and nozzle to prevent clogging. Check for any worn-out parts like O-rings or gaskets and replace them before storage. Proper storage ensures the sprayer remains functional and ready for future use, extending its lifespan and maintaining performance.
4.3 Regular Inspection Checklist
A regular inspection ensures the HDX sprayer operates efficiently. Check the tank for cracks or damage, and inspect the pump for proper pressure buildup. Examine the wand and nozzle for clogs or wear. Verify that all hoses and fittings are secure and free from leaks. Replace any worn-out O-rings or gaskets promptly. Regular inspections help prevent issues before they escalate, ensuring the sprayer functions optimally and extends its service life. A well-maintained sprayer delivers consistent performance and reliability for all your spraying needs.

Troubleshooting Common Issues
Identify and resolve issues like pump failure, leaks, or clogged nozzles. Regular inspections and timely part replacements ensure optimal performance and extend the sprayer’s lifespan effectively.
5.1 Pump Not Building Pressure
If the pump fails to build pressure, inspect the O-ring for wear or damage. Replace it if necessary, as this is a common cause of pressure loss. Check for debris in the pump or nozzle, which can obstruct airflow. Ensure all connections are tight and not loose. If issues persist, consider replacing the pump entirely; Regular maintenance, such as cleaning and lubricating moving parts, can prevent pressure buildup problems. Always refer to the manual for specific replacement procedures and guidelines to ensure proper functionality and safety.
5.2 Leaks in the System
Leaks in the HDX sprayer system often occur due to worn-out O-rings or loose connections. Inspect the O-ring for signs of wear or damage and replace it if necessary. Tighten all fittings and connections to ensure they are secure. If leaks persist, check the hose and fittings for cracks or damage and replace them as needed. Regularly inspecting and maintaining the system can help prevent leaks. Always use genuine replacement parts to ensure compatibility and longevity of the sprayer. Addressing leaks promptly will maintain efficiency and prevent further damage to the system.
5.3 Nozzle Clogging
Nozzle clogging is a common issue that can disrupt spraying efficiency. It often occurs due to debris or sediment in the liquid being sprayed. To resolve this, remove the nozzle and soak it in warm water. Use a small brush or pin to clear any blockages. Regularly cleaning the nozzle and ensuring the liquid is filtered can prevent clogging. If the problem persists, consider upgrading to a higher-quality nozzle designed for heavy use. Proper maintenance will ensure consistent performance and extend the lifespan of your HDX sprayer.

Replacement Parts and Accessories
Replacement parts like O-rings, hoses, and nozzles are available to maintain your HDX sprayer’s performance. Visit official retailers or hardware stores for genuine accessories and upgrades.
6.1 O-Ring Replacement
O-ring replacement is crucial for maintaining the HDX sprayer’s performance. Over time, O-rings may wear out, causing leaks or pressure issues. To replace them, purchase the correct size and type of O-ring designed for your sprayer. Turn off the sprayer and disconnect it from the pressure source. Disassemble the relevant component, remove the old O-ring, and install the new one. Ensure it is properly seated and lubricated for a tight seal. Reassemble the sprayer and test it to confirm the issue is resolved. Regular O-ring maintenance prevents downtime and ensures efficient operation.
6.2 Hose and Fitting Replacements
Hose and fitting replacements are essential for maintaining the HDX sprayer’s functionality. Over time, hoses may crack or fittings may loosen, leading to leaks or reduced pressure. Inspect hoses regularly for signs of wear or damage. When replacing, ensure the new hose and fittings are compatible with your sprayer model. Use a wrench to securely tighten fittings, and test the system for leaks after installation. Proper replacement ensures reliable performance and prevents costly repairs. Always refer to the manual for specific part recommendations and installation guidelines.
6.3 Nozzle and Wand Upgrades
Upgrading the nozzle and wand on your HDX sprayer can enhance performance and versatility. Consider replacing the standard nozzle with an adjustable or wide-fan nozzle for better coverage. Stainless steel or brass nozzles offer durability and resistance to clogging. The wand can be upgraded to a longer or flexible design for reaching distant areas. Ensure compatibility with your sprayer model when selecting upgrades. Refer to the manual for installation instructions and recommended part numbers. Proper upgrades can improve efficiency and extend the life of your sprayer, ensuring consistent results for your spraying tasks.
Safety Guidelines
Always wear protective gear, including gloves and goggles, when operating the sprayer. Ensure proper ventilation and avoid spraying near open flames or sparks. Keep children and pets away during use. Regularly inspect hoses and connections for leaks or damage. Follow all safety precautions outlined in the manual to prevent accidents and ensure safe operation of the HDX sprayer.
7.1 Pre-Use Safety Checks
Before using the HDX sprayer, inspect the hose, wand, and nozzle for damage or blockages. Ensure all connections are secure and free from leaks. Check the tank for proper liquid level and verify that the pressure system is functioning correctly. Wear protective gear, including gloves and goggles, to prevent exposure to chemicals. Always ensure the area is well-ventilated and clear of flammable materials. Follow the manual’s safety guidelines to prevent accidents and ensure smooth operation. Regular pre-use checks help maintain safety and efficiency while using the sprayer.
7.2 Operating the Sprayer Safely
Always operate the HDX sprayer with caution. Maintain a firm grip on the wand and avoid over-pressurizing the system. Use the correct nozzle for your application to prevent excessive spray pressure. Keep the area clear of bystanders and ensure proper ventilation when spraying chemicals. Avoid spraying in windy conditions to minimize drift. Wear protective eyewear and gloves to safeguard against accidental exposure. Regularly monitor the system’s pressure and shut off the pump if unusual behavior occurs. Follow all safety guidelines to ensure safe and effective operation of the sprayer.
7.3 Emergency Procedures
In case of an emergency, immediately shut off the sprayer and evacuate the area. If chemical exposure occurs, rinse affected areas with water and seek medical attention. For leaks, contain the spill and ventilate the area. If the pump malfunctions, disconnect the power source and inspect for damage. Keep emergency contact numbers handy. Always have a first aid kit nearby. Follow proper cleanup procedures to prevent further hazards. Ensure all safety measures are in place to prevent accidents and address issues promptly to maintain a safe environment while operating the HDX sprayer.

Warranty and Support Information
Refer to the warranty section for coverage details and contact information for customer support. Find assistance with repairs, replacements, and general inquiries about your HDX sprayer.
8.1 Warranty Coverage Details
The HDX Sprayer is backed by a limited warranty covering defects in materials and workmanship. The warranty period varies by product, typically ranging from 1 to 5 years. Coverage includes repairs or replacements for faulty parts, excluding wear and tear. For specific details, refer to the warranty document provided with your purchase. Ensure proper registration and maintenance to maintain coverage. Contact customer support for warranty claims or clarifications.
8.2 Contacting Customer Support
For assistance with your HDX Sprayer, contact customer support via phone at 877-769-7447 or through the official website. Live Chat is also available for quick inquiries. Representatives are ready to help with troubleshooting, warranty claims, or replacement parts. Operating hours are typically Monday-Friday, 8 AM-8 PM EST. Visit AnthemBlueCross.com for detailed contact information and support resources. Ensure to have your product details handy for efficient service.

Frequently Asked Questions
Common questions about the HDX Sprayer include troubleshooting pressure issues, replacing O-rings, and maintenance tips. This section addresses these queries to ensure smooth operation and longevity.
9.1 Common User Queries
Users often inquire about troubleshooting pressure issues, replacing worn-out O-rings, and maintaining the sprayer’s performance. They also seek advice on assembling the wand and nozzle correctly. Additionally, questions about leak prevention and the best practices for storing the sprayer during off-seasons are frequent. Some users ask about upgrading parts, such as the nozzle, to improve spray patterns. These queries highlight the need for clear, step-by-step guidance to address common challenges and enhance the overall user experience with the HDX Sprayer.
9.2 Solutions to Frequently Reported Issues
For pressure issues, check the pump and O-rings for wear and replace if necessary. Leaks can often be resolved by tightening fittings or replacing damaged hoses. Clogged nozzles can be cleaned with a fine needle or replaced. Regularly flushing the system and storing the sprayer properly helps prevent these problems. Always refer to the manual for specific part replacements and maintenance tips to ensure optimal performance and extend the lifespan of your HDX Sprayer.
The HDX Sprayer Parts Manual is a valuable resource for understanding and maintaining your sprayer. It provides detailed guidance on assembly, troubleshooting, and care, ensuring optimal performance and longevity. By following the instructions and tips outlined, users can address common issues, replace parts, and operate the sprayer safely and efficiently. This manual serves as a comprehensive guide to help you make the most of your HDX Sprayer, ensuring reliable service for all your spraying needs.