






Understanding Bermuda Pants for Men
Bermuda pants, mid‑thigh shorts for men, mix relaxed comfort with a tailored look, fitting for warm weather or smart‑casual occasions. Proper sizing—waist, inseam, rise—is vital to achieve a polished, balanced silhouette. Measure accurately to avoid a baggy or tight fit. for confidence. and style. Now
Style Variations and Common Uses
Bermuda pants blend relaxed fit with a tailored look, making them versatile for many occasions. Classic straight‑leg cuts offer a timeless silhouette, while tapered or slim styles add a modern touch. Fabrics range from lightweight cottons and breathable linens to performance blends that wick moisture, allowing Bermudas to transition from beachside brunches to office casual days. Color choices span neutral neutrals—black, navy, beige—to bold hues and subtle patterns, letting men express personality without compromising professionalism. Styling is flexible: pair with a crisp button‑down for a polished appearance, or with T‑shirts and polos for relaxed weekend wear. A belt can elevate the ensemble, and loafers or boat shoes complete a nautical vibe. For travel, the shorter length reduces bulk and the breathable material keeps comfort high during long flights. The versatility of Bermuda pants means they can transition seamlessly from casual gatherings to semi‑formal events, provided the cut and fabric are chosen appropriately. When selecting a pair, consider the leg opening proportion to the thigh; a looser opening enhances comfort for active use, while a tighter cut accentuates a lean silhouette. Additionally, the rise—low, mid, or high—affects how the garment sits on the waist and influences the overall aesthetic. By experimenting with these subtle variations, men can tailor Bermuda pants to fit both body shape and personal style preferences and style for us.

Key Measurements for the Perfect Fit
Measure waist, inseam, rise, and hip circumference. Use a flexible tape, wrap snugly around waistline, align with natural waist. Inseam runs from crotch seam to hem. Record rise from crotch to waistline. Accurate numbers ensure a tailored, comfortable look. Check measurements twice for accuracy.!
Critical Dimensions to Record
To achieve a flawless fit for men’s Bermuda pants, start by recording the following essential measurements. First, the waist circumference—measure at the natural waist, just above the belly button, ensuring the tape lies flat and snug without compressing the skin. Next, capture the inseam length from the crotch seam to the desired hem, which for Bermudas typically ends just above the knee. The rise, measured from the crotch seam to the waistline, determines how the garment sits on the hips and thighs; a low rise offers a relaxed look, while a mid‑rise provides a more structured appearance. Additionally, record the hip circumference at the widest point of the buttocks, and the thigh circumference at the mid‑thigh to assess leg width. Finally, note the leg opening or cuff width, which should be slightly tapered for a modern silhouette. By documenting these dimensions accurately, you can compare them against brand size charts, adjust for fabric stretch, and ensure the final product fits comfortably and stylishly.
When measuring, always use a flexible measuring tape and keep it parallel to the floor. Avoid twisting the tape, which can give inaccurate readings. For the waist, place the tape at the natural waistline, not at the belly. For the inseam, measure from the crotch seam to the desired hem, ensuring the leg is slightly relaxed. This method ensures the Bermuda pants will fit comfortably and look proportionate. Cross‑check against the brand chart, adjust inseam or hem for a perfect fit. exactly.!!
Remember to double‑check the measurements before ordering, as a slight mis‑measurement can alter the look of your Bermuda pants now.

Waist Measurement Techniques
Measure at the natural waist—just above the belly button—using a flexible tape. Keep the tape snug but not tight, ensuring it lies flat against the skin. Record the number in inches or centimeters, then double‑check for consistency before selecting a size.!!!
How to Measure the Waist Accurately
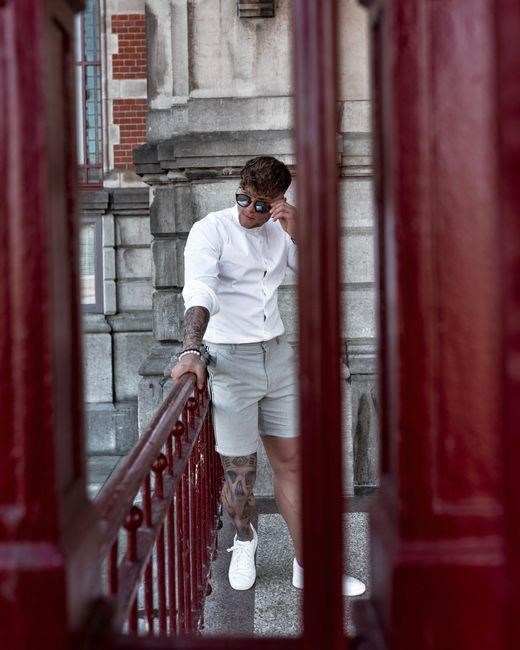
Start by standing upright with relaxed shoulders and a natural posture. Locate the natural waist—the narrowest part of the torso, typically just above the belly button. Place a flexible, non‑stretch measuring tape around this area, ensuring it sits snugly against the skin without compressing it. The tape should be parallel to the floor, not twisted. Pull the tape taut but not tight; a slight give allows for comfortable movement. Read the measurement at the point where the tape meets the starting end, noting the exact number in inches or centimeters. For consistency, repeat the measurement twice and average the results if there is a discrepancy. If you’re measuring for a pair of Bermuda pants, remember that the waist measurement should match the size listed on the brand’s chart; many brands use a 1‑inch allowance for ease. Also, consider the fabric type—stretchy materials may require a smaller waist measurement than non‑stretch fabrics. Finally, record the measurement in a dedicated size log, including the date and any notes about fit preferences, to streamline future purchases and ensure a perfect fit every time.
When measuring, ensure the tape is level across the waist, not tilted. If you have a waist that naturally curves inward, use a flexible tape that can accommodate the shape. For a more precise fit, consider measuring twice—once after a workout and once after a full day of activity—to capture any natural expansion. Record both measurements and choose the larger value to avoid a too‑tight fit.

Hip and Thigh Measurement Details
Measure the widest part of the hips, just below the buttocks, using a flexible tape; Then wrap the tape around the thigh at the mid‑point, ensuring it’s snug but not tight. Record both values for accurate sizing.Use a tape that follows the natural curve
Capturing Hip and Thigh Circumference
Accurate hip and thigh measurements are essential for a well‑fitting pair of Bermuda pants. Begin by selecting a flexible, non‑stretch measuring tape; For the hip circumference, position the tape around the fullest part of the buttocks, ensuring it lies flat against the skin and remains level horizontally. The tape should be snug enough to hold its shape but not compress the flesh; a gentle pressure is sufficient. Record the reading in centimeters or inches, depending on your preferred system.
Next, measure the thigh circumference at the midpoint between the hip and the knee. Stand upright and locate the point where the thigh’s curvature is most pronounced; Wrap the tape around the thigh, again keeping it level and snug. This measurement helps determine the leg opening and overall comfort. For a more precise fit, some brands recommend measuring the thigh at the widest point, which may slightly differ from the midpoint.
When recording both measurements, double‑check for consistency. Place the tape on a flat surface and use a mirror or a second pair of eyes to confirm that the tape is parallel to the floor and not twisted. Small errors can lead to a noticeable difference in the final product. Store the values in a dedicated sizing sheet, noting any variations that might affect the cut or style of the garment. Providing a balanced silhouette that complements the wearer’s physique. Suitable for both casual and semi-formal occasions

Inseam and Length Considerations
Measure from the top of the inner thigh to the desired hem, ensuring the tape follows the natural leg line. For Bermudas, aim for a mid‑thigh cut—typically 20–24 inches. Adjust for personal preference, keeping the length proportional to height and style.
Determining the Ideal Inseam
Finding the right inseam for a Bermuda is all about balancing length with style. Begin by placing a flexible tape measure on a flat surface and standing straight with feet together. Identify the natural crease where the thigh meets the pelvis—this is the starting point. Position the tape’s end at the inner seam of the crotch, following the curve of the leg without pulling. Extend the tape down the inside of the leg to the desired hem line. For most men, a 20–24‑inch inseam provides a clean, mid‑thigh cut that sits just above the knee, offering a modern, tailored look. If you prefer a slightly longer silhouette, add an inch or two, but avoid exceeding 26 inches, which can create an oversized, boxy feel. Note that the inseam measurement is independent of the rise; a low‑rise pair still requires the same length. Always cross‑check your measurement against the brand’s sizing chart, as some manufacturers use a different reference point or account for fabric stretch. Denim may contract slightly, while linen can expand, so consider the material’s behavior. After measuring, try the pair on with the shoes you plan to wear to ensure the hem falls comfortably without dragging or bunching, and adjust if necessary. For taller individuals, a 24‑inch inseam may be more appropriate, while shorter men might find a 20‑inch inseam more flattering. Additionally, consider the intended activity; a more casual, relaxed fit may benefit from a slightly longer inseam to allow for movement. Always remember that the inseam is a key factor in achieving a balanced silhouette, and a well‑measured pair will elevate both comfort and style.

Adjusting for Rise and Leg Opening
Measure the rise from the crotch seam to the waistband, ensuring it matches your torso length. For leg opening, tape around the hem, noting width; a 4‑6 inch opening suits most styles. Adjust by adding or cutting fabric, keeping proportions balanced
Fine-Tuning Rise and Leg Opening Measurements
When adjusting Bermuda pants, precision in rise and leg opening ensures a flattering fit. Start by measuring the rise: place a flexible tape from the crotch seam to the top of the waistband, keeping the tape snug but not tight. Record the length; a lower rise suits a relaxed look, while a higher rise offers a more tailored silhouette. Next, assess the leg opening. Measure the circumference at the hem, noting the width. A standard opening ranges from 4 to 6 inches; narrower openings create a slimmer profile, whereas wider openings provide a relaxed, casual vibe. If the rise is too short, add fabric to the back panel or adjust the waistband height. For a higher rise, trim the back panel or raise the waistband. To modify the leg opening, carefully cut or sew fabric to achieve the desired width, ensuring the seam stays straight. Always test the fit by wearing the pants, checking for comfort and mobility. Adjustments should be incremental; small changes can dramatically improve the overall look. Remember that fabric stretch, pattern placement, and personal preference all influence the final result. By meticulously fine‑tuning these dimensions, you can transform a standard pair of Bermuda pants into a custom‑fit piece that complements your body shape and style. When tailoring, consider the fabric’s natural drape; heavier fabrics may require a slightly larger rise to avoid pulling. Additionally, the leg opening should align with the shoe style—loafers call for a tighter opening, while sneakers allow more room. Use a tailor’s chalk to mark adjustments before cutting to prevent mistakes. Finally, always keep a spare pair of measurements to compare before finalizing the cut, ensuring consistency across multiple pairs.

Selecting the Right Size Chart and Brand Variations
Use each brand’s chart, noting that sizing varies. Measure waist, inseam, rise, and leg opening. Compare your numbers to the chart, adjusting for high or low rise. Test fit in store or with a tailor to ensure comfort and style. today now!
Comparing Brand‑Specific Sizing Guidelines

U.S. labels match waist inches to the size number, while European or Asian lines translate waist circumference into metric codes that can differ from U.S. equivalents. This mismatch may cause a waist that feels too tight or too loose if you rely solely on the printed size.
Begin by measuring your waist, inseam, rise, and leg‑opening with a flexible tape. Then consult the brand’s dedicated chart, which lists waist and inseam in both inches and centimeters. Pay attention to the “fit” descriptor—slim, regular, or relaxed cuts alter the recommended waist range. A slim‑fit Bermuda, for example, may call for a waist 2–3 inches smaller than a regular fit of the same numerical size. The chart may also list a suggested rise range, aiding in selecting the correct leg height for a perfect fit.
Rise is another critical factor. Brands that emphasize a higher rise will recommend a waist slightly larger than the actual circumference to accommodate extra legroom. Low‑rise models may call for a tighter waist. Checking the rise column in the chart ensures you’re not misreading the waist size.
Because of these nuances, read customer reviews that mention fit, and look for a “fit guide” video or visual comparison chart. These resources show how a particular size looks on a model of a specific height and build, helping you decide whether a brand runs small or large. If ordering online, consider picking a size one step larger than usual and tailoring the waist or inseam if needed. Mastering these brand‑specific details guarantees a confident fit and a polished look every time. This approach saves time and money.